
TL;DR
Only cellular tablets have a SIM slot. When finished, shut down the computer, eject the tray with a pin, and insert the nano-SIM as indicated on the tray. Then, slide the tray back into the case. Then turn on mobile data. If the SIM isn’t detected, reseat it, test it in another device, check settings and updates, and inspect the tray before you reset.
You open your new tablet and can’t find where the SIM card goes. A SIM card in a tablet PC is a small chip that connects the tablet to a mobile network. Only cellular models have a slot, usually in a small tray on the edge. Power off, eject the tray, place the nano-SIM, and slide the tray back. This guide shows each step and how to fix a SIM that isn’t detected.
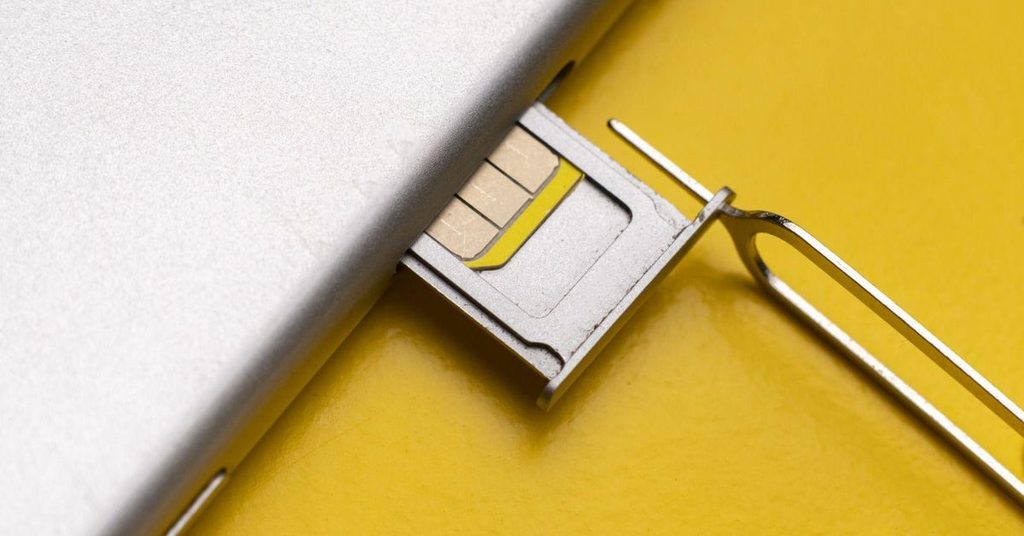
What Is a SIM Card in a Tablet PC?
A tablet PC is a touchscreen computer, such as an Android tablet, an iPad, or a Windows tablet or 2-in-1. A SIM card is a small chip from your mobile carrier. It identifies your account, so the tablet can use a cellular data plan when Wi-Fi isn’t available.
There are two ways to use a mobile plan:
- Physical SIM: a small card you place in a tray.
- eSIM: a built-in digital SIM that you activate with a QR code or app.
Does your tablet have a SIM slot?
Not every tablet does. Many are sold in two versions: Wi-Fi only, and Wi-Fi plus cellular. Only the cellular version has a SIM slot. Lenovo’s Tab M8 guide, for example, notes that the Wi-Fi version has no nano-SIM slot.
Check these signs:
- The box or spec sheet says LTE, 5G, cellular, or WWAN.
- The model name includes a cellular tag. Retailers often list it separately.
- The edge of the tablet has a tiny pinhole next to a tray.
- Your settings show a Cellular, SIM, or Mobile network menu.
A slot alone doesn’t guarantee a connection. The tablet also needs a cellular modem inside. Lenovo’s own Windows guide says a slot doesn’t equal connectivity by itself.
Which SIM size does your tablet use?
| SIM size | Dimensions | Common in |
| Standard (mini) | 25 × 15 mm | Very old devices |
| Micro | 15 × 12 mm | Older tablets |
| Nano | 12.3 × 8.8 mm | Nearly all current tablets |
Lenovo’s current cellular tablets use nano-SIMs, according to buying guides. Check your manual to be sure. Also avoid adapters. A misaligned card can jam in the slot.
How Do You Insert a SIM Card in a Tablet PC?
You need a nano-SIM from your carrier and the ejector tool that came with your tablet. A straightened paper clip also works. When you buy the plan, tell the carrier it’s for a tablet. Some plans are phone-only.
Follow these steps:
- Confirm your model has a slot. Wi-Fi-only tablets don’t.
- Power the tablet off. The company warns against inserting or removing a SIM card while the tablet is operating, since it may damage both the card and the device.
- Find the tray. It’s usually on a side edge. On some models, a small cover protects it.
- Eject the tray. Push the tool straight into the pinhole with gentle, steady pressure. The tray pops out.
- Place the SIM. Match the card’s cut corner to the tray’s shape. Follow the diagram on the tray or in the manual.
- Slide the tray back. Push it in until it sits flush. Don’t force it.
- Power on. Wait a minute for the tablet to detect the SIM.
- Turn on mobile data in settings.
Orientation changes by model. Some trays need the gold contacts facing up, and others need them facing down. That’s why the diagram matters more than any rule of thumb.
What if your tablet has a hybrid tray?
Some tablets share one tray for a nano-SIM and a microSD memory card. Each has its own recess. Put the SIM in the SIM recess, and don’t swap them. You should check whether your model has a hybrid tray so that the SIM and card can both operate simultaneously.
What about Lenovo laptops and Windows 2-in-1s?
Many Lenovo laptops and Windows tablets follow the same tray method. Some older models use a push-pull slot instead. You push the card in until it clicks, and push again to release it. Never use tweezers or metal tools to pull a card from a push-pull slot, since that can damage the slot. Some laptops hide the slot under a cover or inside the battery compartment, so check the manual first.
How Do You Remove a SIM Card From a Tablet?
Removal is the same process in reverse:
- Power the tablet off.
- Eject the tray with the tool or a straightened paper clip.
- Lift the SIM out by its edges. Don’t touch the gold contacts.
- Store it safely. A small case protects it from dust and static.
- Slide the empty tray back in. This keeps dust out of the slot.
If you plan to switch carriers or sell the tablet, remove any SIM PIN you set. Then sign out of your accounts.
How Do You Set Up Cellular Data After Inserting the SIM?
Your carrier may need to activate the SIM first. Follow their steps, which are usually on a card or app. Then set up the tablet.
On a Windows tablet
Open Settings, then Network & internet, then Cellular. Turn cellular on, and choose the SIM. If data doesn’t work, check the carrier’s APN (access point name) settings. Your carrier lists the correct ones.
On an Android tablet
Open Settings, then Network & internet (or Connections on some brands). Open SIMs or Mobile network. Turn on Mobile data. If there’s no data, enter the carrier’s APN.
On an iPad
Open Settings, then Cellular (also called Cellular Data). Follow the prompts from your carrier to activate the plan.
Steps vary by version and brand, so check your manual if a menu looks different.
[OUTBOUND LINK SUGGESTION: link “Cellular” to Microsoft Support’s page on cellular settings in Windows]
How Do You Fix a Tablet That Can’t Detect the SIM Card?
Work through these fixes in order. Stop when the problem goes away.
- Clean and reseat the SIM. Power off, remove the tray, and wipe the SIM’s gold contacts with a dry, lint-free cloth. Reinsert the tray firmly and evenly.
- Test the SIM somewhere else. Put it in a phone or another tablet. If it fails there, the SIM is the problem. If it works there, the tablet is the problem.
- Test another SIM in your tablet. If a different SIM works, ask your carrier to replace yours.
- Check your carrier account. Make sure the SIM is activated. Confirm your plan supports tablets and data. Also check that your tablet is unlocked or compatible with that carrier.
- Check your settings. Turn airplane mode off. Turn mobile data on. If you have two SIMs, pick the right one. Look at the network mode, such as 4G or 5G. Enter APN settings if the carrier provides them.
- Restart the tablet. A simple restart clears many network glitches.
- Update the software. Install system and carrier updates. Updates often fix SIM and modem bugs.
- Inspect the tray and slot. Look for a bent or loose tray, dust, a cracked SIM, or a card that sits crooked. Don’t poke metal tools into the slot.
- Reset network settings. This clears saved Wi-Fi and cellular settings. It’s less drastic than a full reset.
- Factory reset as a last resort. Back up your files first. A reset erases the tablet.
When should you get professional help?
Seek help if:
- The SIM works in another device but never in yours, even after all fixes.
- The tray is stuck, bent, or visibly damaged.
- The tablet has water or drop damage.
- The carrier confirms the SIM and plan are fine.
If the tablet is under warranty, contact the maker before a third-party repair. Unofficial repairs can void warranty coverage.
What Are Safe Habits for Using a SIM Card in a Tablet?
A few habits prevent most problems:
- Never force the tray or the card. Realign it instead.
- Don’t use adapters or cut your SIM. Ask the carrier for the right size.
- Keep your ejector tool handy. A paper clip in a drawer works too.
- Set a SIM PIN. It stops others from using your plan if the SIM is stolen.
- Check hotspot and tablet rules. Some plans limit tablet use or tethering.
- Keep a backup of your files. Do this before any reset.
Conclusion
Using a SIM card in tablet pc hardware is simple once you know your model has a slot. Power off, eject the tray, set the nano-SIM the way the markings show, and turn on mobile data. If the tablet can’t find the SIM, reseat it, test it elsewhere, and check settings and updates before you reset.
Check your tablet’s spec sheet today to confirm it supports cellular. Then explore more tablet and laptop guides at Techprixo, and share this article with someone who’s stuck at a “No SIM” message.
FAQ
No. Only cellular models, often labeled LTE or 5G, have a SIM slot. Wi-Fi-only tablets don’t have one, and a SIM won’t work in them. Check the box, spec sheet, or model name. A tray pinhole on the edge is also a good sign.
Most current tablets use a nano-SIM, which measures 12.3 by 8.8 millimeters. Older tablets may use micro or standard SIMs. Check your manual or ask your carrier for the right size. Avoid adapters, since a misaligned card can jam in the slot.
It depends on the model. Match the card’s notched corner to the tray’s cutout, then follow the diagram on the tray or in your manual. Some trays need gold contacts facing up, and others need them facing down. If it doesn’t sit flat, remove it and recheck. Never force it.
Common causes include a badly seated SIM, a dirty or damaged SIM, airplane mode, a carrier or activation problem, outdated software, or a damaged tray. Power off, reseat the card, and test it in another device. If it works there, check your tablet’s settings and updates, then inspect the tray.
Many newer tablets support eSIM, which is a built-in SIM you activate with a carrier QR code or app. It needs no tray. Support depends on your model and carrier, so check your specs and plan. Some tablets can hold both a physical SIM and eSIM.
1 thought on “SIM Card in Tablet PC: How to Insert, Remove, and Fix Detection Problems”